Vlogging has become a super popular way for folks to connect, share stories, and even launch careers online. If you’ve watched your favorite YouTubers or TikTok creators and thought, “I could totally do that,” you’re not alone. Starting out can feel a little intimidating, especially with so many tools and tips getting thrown around. I’m going to break down the basics of vlogging for beginners and help you kick off your own vlogging adventure with confidence.
What You Need to Start Vlogging: Basic Equipment and Setup
The gear you choose can make shooting videos a lot smoother, but getting started shouldn’t mean breaking the bank. Most people think they need fancy cameras, but honestly, you can begin with what you already have. Here are a few basics you’ll want to round up when you get going:
- Camera: Your smartphone camera works great for starting out. Many vloggers use their phones for years before upgrading to bigger cameras.
- Microphone: Good audio makes a huge difference. Affordable clipon mics or small external mics you can plug into your phone work really well.
- Lighting: Shoot near windows for natural light or try a simple ring light to boost brightness without harsh shadows. You don’t need a lot to start out; household lamps can even do the trick.
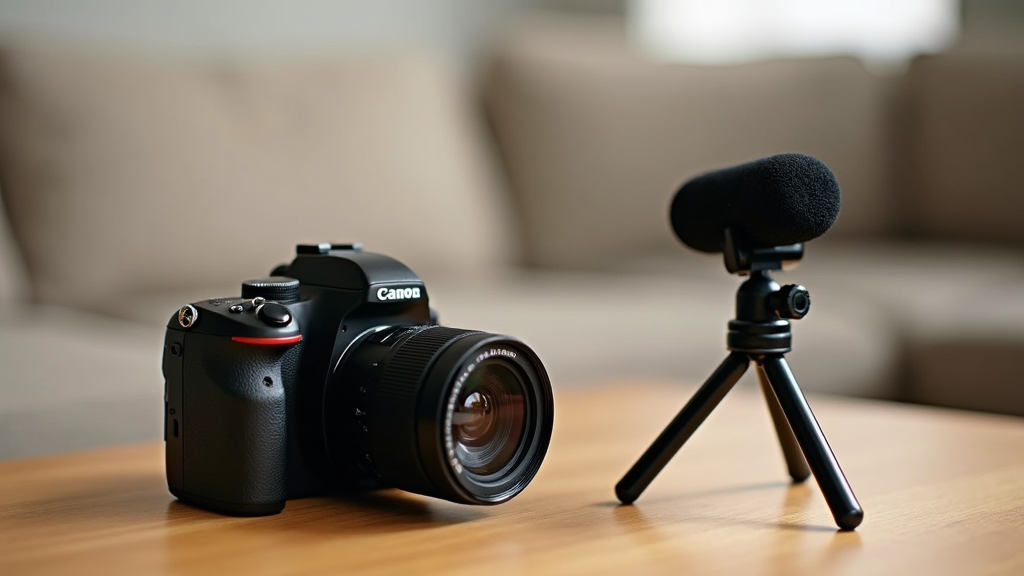
- Tripod or Stand: Keeping your footage steady is super important. There are tons of budget tripod options, including tabletop models for recording at your desk or on a shelf.
I started my first vlogs at my kitchen table with a phone stacked on books. It looked pretty makeshift, but focusing on clear audio and steady shots made a big difference. Over time, I tried setting up in different rooms to see what backgrounds looked best and made sure to work with whatever light I had available.
Getting Comfortable On Camera: Building Confidence
Talking to a lens feels awkward at first; I remember stumbling over my words and worrying about how I looked. Here are some things that helped me loosen up and stop overthinking it:
- Practice off camera: Try recording yourself and watching it back privately. You’ll get used to your own voice and see what habits you want to change or keep.
- Script, bullet points, or improv: Find your style. Some folks like full scripts, others keep notes, and some just wing it. Play around with different methods and see what fits you best.
- Embrace mistakes: Little flubs can make you relatable, not just polished. Editing can cut out the big “oops” moments, but showing your real self keeps things authentic and fun to watch.
Most vloggers sound more natural after a few videos. That early awkwardness fades quickly once you get into a rhythm, and you’ll notice yourself loosening up as you film more often. Don’t be afraid to laugh at yourself or share those behind-the-scenes moments where things don’t go perfectly—that’s what viewers connect with!
Step-by-Step Guide: Filming and Editing Your First Vlog
Recording a video can be as simple or complex as you want, but a repeatable process helps a lot. Here’s a rundown I use for every new vlog:
- Plan your topic: Jot down what you want to cover. It doesn’t have to be detailed; just make sure you know your key points so you don’t wander off track.
- Set up your space: Check your lighting, pick a background, and make sure you won’t be interrupted. Declutter anything distracting behind you or in the frame.
- Check your gear: Charge your phone or camera, double check your mic, and make sure you’ve got plenty of storage space to record without interruptions.
- Record in short takes: Pausing and starting between topics makes editing much easier. Don’t stress if you need several attempts to get a take you like.
- Edit with apps: Mobile apps like InShot, CapCut, or iMovie make editing simple. Cut out mistakes, add some background music, and drop in text or subtitles if you want. You can find lots of tutorials online for these apps if you want to take your edits up a notch.
Uploading to YouTube, TikTok, or Instagram is pretty straightforward; just make sure you know the platform’s preferred video format and length. Small details like clear audio, neat framing, and consistent lighting will make your vlog look good from the start. Try to pick thumbnails that make people want to click on your video—an eye-catching thumbnail can really help.
Things Beginners Should Consider Before Publishing
Vlogging isn’t just about pressing record and posting everything. Here are a few things I always double check before hitting “publish” on a new video:
- Privacy: Be mindful of what’s visible in your background; things like family photos, addresses, or sensitive info can slip in accidentally if you’re not keeping an eye out.
- Consistency: Try to upload on a regular schedule, even if it’s just once a week. Viewers like knowing when to expect something new and regular uploads keep your channel growing.
- Copyright: Using music, images, or clips you didn’t create can cause issues. Plenty of royalty free options are available online, so you don’t have to worry about strikes or takedowns.
- Feedback: Comments can be helpful but also a little tough to handle. Filtering out harsh criticism to focus on constructive advice really helps keep you motivated instead of discouraged.
I had to learn to set boundaries on what I shared, too. Only publish content you’re comfortable with the world seeing. Once it’s online, it’s tricky to take back, so think twice before sharing super personal moments.
Audio Matters
Clear audio stands out even more than video quality for a quick scroll. Using a small lapel mic or even sitting closer to your phone helps cut out background noise. If you’re filming outside, try to avoid windy spots or heavy traffic so your viewers can hear you without distractions.
Staying Motivated
Not every vlog will have a ton of views right away, and that’s totally normal. Celebrate little wins, like improving your edits or getting positive comments, and keep experimenting until you find your groove. Over time, your confidence will build and you’ll see progress you can be proud of.
Taking Vlogging to the Next Level: Tips for Growth
Once you’ve posted a few videos and are feeling good about your setup, try some new things to keep growing:
- Try new formats: Experiment with dayinthelife, Q&A, tutorials, or even simple voiceovers and timelapses to mix things up.
- Learn basic editing tricks: Cut out long pauses, add jump cuts, or drop in some background music to make your videos flow smoothly and feel more professional.
- Connect with your audience: Replying to comments, asking for ideas, or teaming up with other vloggers can help build a loyal following and keep your creative energy high.
- Stay inspired: Watch other vloggers, even outside your favorite niche, for fresh inspiration and creative ideas. There’s always something new to learn if you keep your eyes open.
Adding little upgrades, like a tiny LED light, better tripod, or investing in editing software, pays off as you get serious. Just make one change at a time so you’re not overwhelmed and can really get a feel for what helps your process most.
Common Questions From Beginner Vloggers
It’s normal to run into questions as you’re starting out. Here are a few I hear all the time, with my honest take:
Question: What’s the easiest way to start vlogging with no experience?
Answer: Grab your phone and record short clips about something you’re interested in. Editing out mistakes is a breeze with mobile apps, and you’ll get better with practice. Add a quick intro and point out what you like.
Question: How do I get over being nervous in front of the camera?
Answer: Nearly everyone feels awkward at first. The more you record yourself (even if you just delete it afterward), the easier it’ll get. Talk to the camera like you would to a friend or family member and don’t be afraid to smile and have fun.
Question: When should I upgrade my gear?
Answer: Once you’ve made a handful of vlogs and feel limited by your current setup (like your audio isn’t clear enough or your camera is always out of focus), it’s probably time to add something new. No rush, though; plenty of people grow big channels using basic gear for years.
Question: How long should a beginner vlog be?
Answer: Keeping videos between 3–8 minutes is usually a sweet spot for new creators. It’s enough time to share a story but not so long that editing feels overwhelming. You can always make longer videos as your confidence grows.
Choosing Topics and Finding Your Unique Style
Many new vloggers worry about not having a “unique” angle, but honestly, who you are matters more than what you talk about. Share what excites you, whether it’s your morning routine, cooking experiments, favorite games, or creative hobbies. People tune in for an authentic point of view, not just cutting edge production.
Your style will change and grow over time. Maybe you’re naturally funny, super organized, or just really honest about your ups and downs. The more you share, the easier it becomes to find what clicks with you and your viewers and build up your channel’s vibe.
If you’re struggling with topic ideas, jump into common challenges or trends in your niche, do reaction videos, or just answer questions you see in the comments section. There are endless possibilities, and the more you vlogging, the more you’ll stumble upon your favorite formats and topics.
Ready to Publish? Final Thoughts for Beginners
Getting into vlogging is easier now than ever before. Focus on using the gear you already have, shoot in spaces with good light, and edit your videos for clarity and fun. Small, steady improvements matter, and your confidence will build over time. Perfection isn’t necessary; sharing your real self is what builds connections and keeps people watching. So, hit record, upload that video, and take the first step toward your vlogging adventure. Remember, everyone starts somewhere—so just jump in and enjoy the ride!